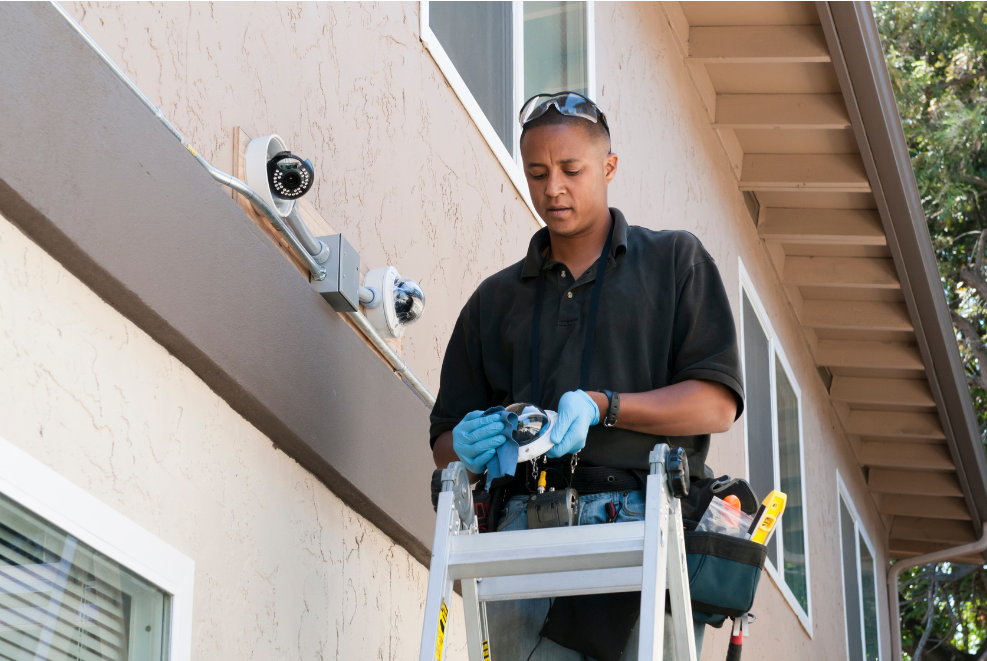
In this article, you will learn how to properly clean your security cameras to keep them in top condition. Whether you have one or multiple cameras, regular cleaning is essential to ensure that your home security system is functioning properly.
Cleaning your security cameras is an important step in maintaining their functionality. Over time, dirt and debris can accumulate on the lenses, obstructing the view and reducing the camera’s effectiveness. By following the steps outlined in this article, you can keep your cameras clean and functioning at their best.
Before you start your maintenance, make sure to read the manual and follow any special instructions from the manufacturer.
How To Clean Security Cameras – Quick Answer:
Before you start your maintenance, make sure to read the manual and follow any special instructions from the manufacturer.
- Turn off the camera and disconnect it from the power source before cleaning.
- Use a soft, lint-free cloth to wipe the camera lens and body. Avoid using abrasive materials or cleaning solutions that could damage the camera.
- If the camera is located in a dusty environment, use a can of compressed air to blow away any dust or debris that has accumulated on the camera.
- For outdoor cameras, use a hose to wash away any dirt or debris that has accumulated on the camera. Avoid using high-pressure water that could damage the camera.
- Check the camera housing for any signs of damage or wear and tear. Replace any damaged parts as needed.
- Reconnect the camera to the power source and turn it back on.
- By following these steps, you can ensure that your security cameras are clean and functioning properly, providing you with clear and reliable footage.
How Do Security Cameras Get Dirty
Security cameras can get dirty in a variety of ways. One common way is through exposure to the elements. Rain, fog, humidity, and extreme weather conditions can cause water droplets and moisture to accumulate on the camera lens, leaving watermarks and smudges. Dust, dirt, and debris in the air can also settle on the camera lens, obscuring the view and reducing image quality.
Insects and spiders can leave webs, smudges, and other marks on the camera lens, especially if the camera is placed in a dark area. Fingerprints and other contaminants can also accumulate on the lens, affecting image quality.
To prevent security cameras from getting dirty, it is important to place them in areas that are less likely to be exposed to dirt, debris, and insects. Regular cleaning and maintenance can also help keep cameras clean and functioning properly.
Video: How To Clean Security Cameras
Why You Should Clean Your Security Camera
Regular cleaning of your security camera is essential to ensure optimal performance and protection of your property. A dirty lens can significantly affect the image quality, making it difficult to monitor your property effectively. Moreover, debris, dust, and spider webs that accumulate on the lens can cause ghosting, which can obstruct or alter the view of your camera’s lens. To avoid these issues, it is essential to clean your security camera frequently.
Cleaning your security camera not only improves its image quality and performance but also ensures your safety and peace of mind. A clear footage from your camera can help you monitor your property and detect any suspicious activity, providing you with an added layer of protection. Regular cleaning of your security camera also ensures that it remains effective in capturing high-quality images, even in low-light conditions.
In addition to cleaning the lens, it is also crucial to clean the housing unit of your security camera, especially if it is an outdoor camera. Outdoor cameras are more prone to accumulating dirt and debris, which can affect their performance and effectiveness. Therefore, it is recommended to clean the housing unit of your outdoor security camera at least once a month.
To ensure the effectiveness of your security camera, it is essential to clean it often and maintain it properly. Regular cleaning of your security camera will not only improve its image quality and performance but also provide you with peace of mind that your property is being monitored effectively.
Cleaning a Surveillance Security Camera – Step By Step:

In order to thoroughly clean your security camera there are two things you need to do:
- Clean the camera lens regularly.
- Keep the housing clean and dust-free.
The actual cleaning process lasts 5-10 minutes per camera and is pretty simple. Taking just a few minutes every month or so will keep your security cameras working well and possibly extend the life of your surveillance system.
The best way is to use a special camera brush or compressed air for this purpose. You can also use a clean microfiber cloth to clean the lens. Don’t use a common cloth as you risk scratching the lens.
Many people use cotton swabs for cleaning cameras but it is not the right way; the cotton swab can leave tiny fibers on the security camera lens which are very hard to remove. This may cause scratches and influence the image quality.
Other items that shouldn’t be used in cleaning your security camera include anti-bacterial or harsh (extra-strength) detergents, ammonia, alcohol, or other solvents, paper towels, newspaper, or other rough materials.
Steps:
- Turn off the security camera and unplug it from the power source.
- Use a can of compressed air to blow air at the lens to remove any loose dirt or debris. Hold the can upright and use short bursts of air to avoid causing any damage.
- Use a soft brush to remove any big dirt particles. Clean from top to bottom and from left to right. If using a microfiber cloth, wipe the lens with gentle pressure in a circular motion. Do not use a common cloth as it may scratch the lens.
- Clean inside the housing as well because there can be small dirt and dust particles that block the view. Use a soft brush or blower brush to clean the inside.
- If there are any stubborn stains, use a lens cleaning solution and a lint-free cloth to wipe down the lens. Do not use water, dish soap, tissues, paper towels, newspaper, or other rough materials as they may damage the lens.
- Once you are finished cleaning, turn the camera on to see if everything works fine.
Remember to clean your security camera regularly to keep it working well and possibly extend the life of your surveillance system. Avoid using cotton swabs, anti-bacterial or harsh detergents, ammonia, alcohol, or other solvents as they may scratch the lens or influence the image quality. By following this step-by-step guide, you can clean your security cameras with ease and confidence.
Regular Cleaning Of The Housing Unit:
To maintain the camera housing’s integrity, it is recommended to clean it regularly. You can use wet wipes or special products like “caulk cleaner” to clean the housing unit. However, do not use cleaning agents that contain alcohol as it can damage the camera housing. Gently wipe the housing with a wet wipe or damp cloth and allow it to dry completely. Ensure that the housing is free of any water droplets; if not, use a special air duster to remove them. Lastly, check for any water stains on the camera lens after cleaning.
FAQs
What is the best cleaner for a security camera lens?
The best cleaner for a security camera lens is a lens cleaning solution specifically designed for camera lenses. Avoid using household cleaners or solutions that contain harsh chemicals that can damage the lens coating.
How often should security cameras be cleaned?
Security cameras should be cleaned at least once a month to ensure that they function properly. However, if the camera is located in a dusty or dirty environment, it should be cleaned more frequently.
What should you avoid when cleaning a security camera?
When cleaning a security camera, avoid using abrasive materials such as paper towels or tissues that can scratch the lens. Do not use cleaning solutions that contain ammonia or other harsh chemicals that can damage the lens coating.
Additional Reading
You Might Also Be Interested In Reading: Ring Floodlight Cam Wired Plus Review or Ring Spotlight Cam Review
Conclusion
Security camera lenses and the housing unit can get dirty over time. The dirt, oil, and dust particles that accumulate on the lens will blur out images from the camera. If left untreated, this could lead to a false sense of security or even an accident in which a perpetrator is not identified. In order to avoid these consequences, it’s important for you to clean your security cameras regularly.
Picture quality should be maintained every month or so with these cleaning methods. If you follow these steps on a regular basis, your security cameras should last a long time.
If you have a favorite way to clean your security camera, feel free to share it in the comments below.


